By Emma Melvin
Stamp carving is an art form using a carving tool; called the linoleum cutter, to carve a design into a rubber block. With the final product, you can roll paint on it to print on whatever flat surface you want. These stamps are used to print on a variety of objects. You could use it to print on things like paper, fabric, wood, or clothing to create a design.
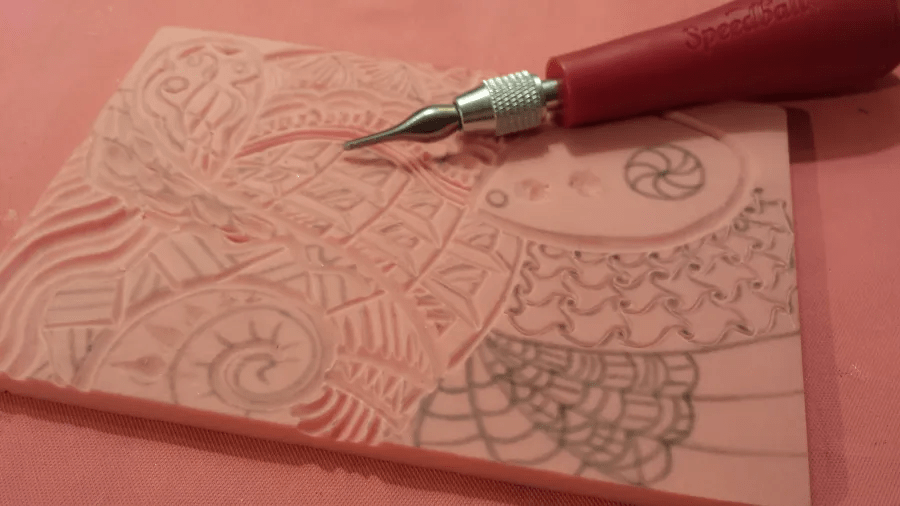
As for making the stamp, you will want to draw your design on either a piece of paper and trace it onto the rubber; or draw the design directly on the rubber piece. The linoleum cutter comes with 3-5 different size blades that can scoop out pieces of the rubber. With this tool, you can carve out all of the linework that you drew on the rubber. The blades can switch out which out, which is great for different sizes of details.
If your design is in the center, you can carve around the line work instead, so that there is no background paint once you use it. A rubber block can be replaced with a pink eraser though, for a cheaper alternative. It can be carved the same way as a rubber block.
Make sure to work with the tool handle facing towards you, and the blade facing away; as it is sharp. You don’t need too much force with carving, as the rubber is soft and flexible. When you are done carving, you can finally use it to paint on something. Usually using a special printmaking ink, or a regular stamp ink pad. If you are using printmaking ink, you will need a rolling tool called a brayer to apply the ink evenly across the stamp.
To use the stamp, squeeze a dot of paint onto a flat palette, and roll the ink evenly across the brayer. Then, roll it onto the design side of the stamp and press it on your paper. Then your design is printed and you are all done!
